Supported Products
Availability
DISMUI is now part of the Elbacom Embedded Toolkit. Please let us know if you are interested and contact one of our offices.
How It Works
DISMUI allows adding and removing features and modules to a Windows Embedded image very easily. The tool will automatically recognize the Windows version is running on and will try to find the source directory for the components.
Modifying a currently running image (online)
To run DISMUI, you will need the .NET 4.0 Framework installed on your device. Insert the setup media into your device (OPK) or copy the Distribution Share or Catalog to your device.
Then run DISMUI.exe from the Elbacom Embedded Toolkit (or from your download directory).
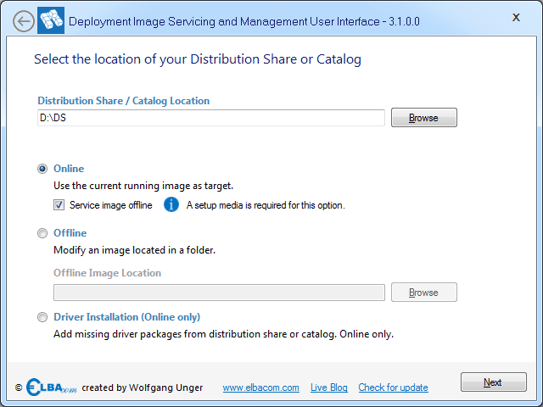
Check if DISMUI selected the correct Distribution Share or Catalog.
Leave the selection on the “Online” radio button and click “Next”.
Windows Embedded Standard 7 Windows Embedded 8 Standard Windows Embedded 8.1 Industry Pro
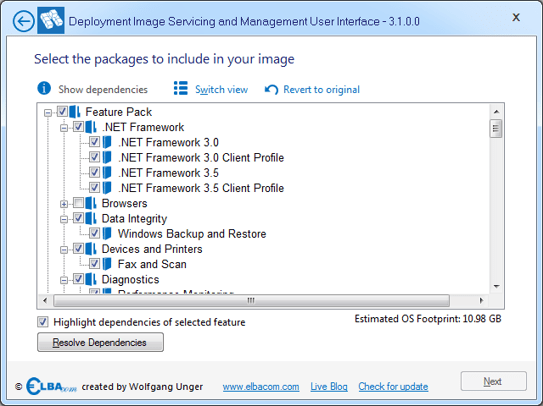
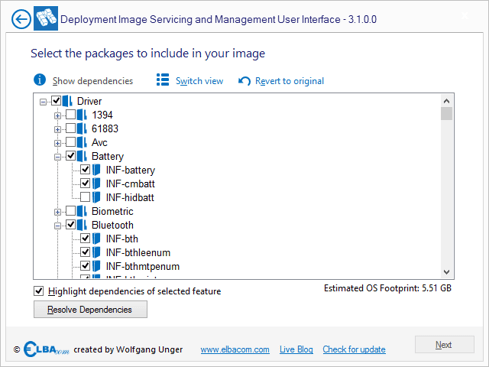
DISMUI will now enumerate all installed components and all available components.

Check all features, that you want to add and uncheck all features that you would like to remove from your image.
DISMUI will show you the estimated footprint impact of your selection (except for Windows Embedded 8.1 Industry).

Once you have made your changes, click on “Resolve Dependencies” to ensure, that all required components are included.
Also fix any possible conflicts – DISMUI will display a windows stating what needs to be done to solve it.
Then click on “Next”.
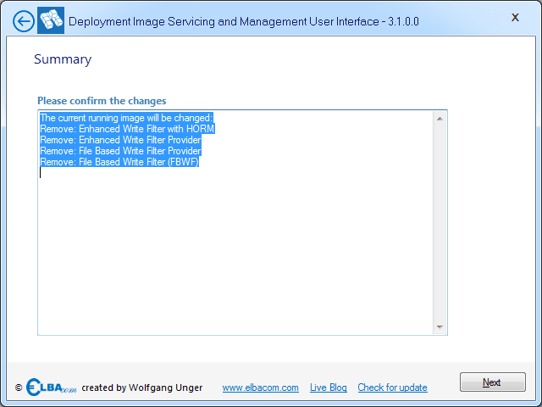
Have a look at the summary and click “Next”.
DISMUI will now make the changes to your image.
Once completed, you will receive a message from the tool. If an error has occured, you can open the log file to see what went wrong.
Image Servicing in Windows Embedded POSReady 7
Windows Embedded POSReady 7 does not allow modifying the image while it is running. That means, that you would need to boot from the setup media and modify the image from the command line. As this is not an easy task, DISMUI can be used while the system is running and it will do all the changes offline automatically!
To modify a Windows Embedded POSReady 7 image, just run DISMUI as described above.
You will notice that the “Service image offline” checkbox is checked per default.
Please note, that a setup media is required for this mode to work.
Click “Next” to make your modifications.
Check or uncheck features as described above. Then run the “Dependency Check” and click “Next”.
Review your changes and click “Next”.
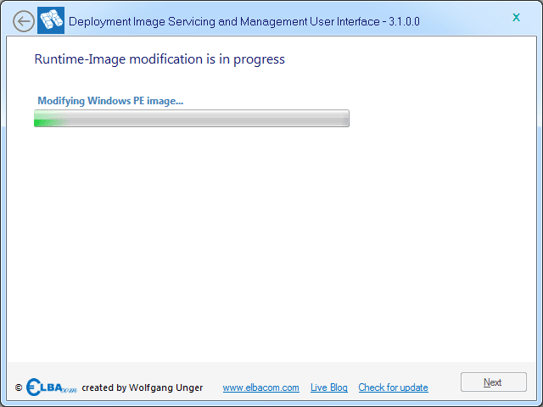
DISMUI will now create a temporary Windows PE image, that will make the changes to your operating system while it is offline. This way you are still supported but don’t need to take care about the details.
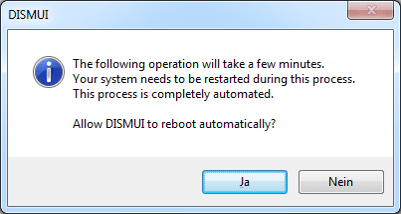
As this procedure takes some time and requires several reboots, DISMUI asks you if it is allowed to reboot automatically.
Select “Yes”.
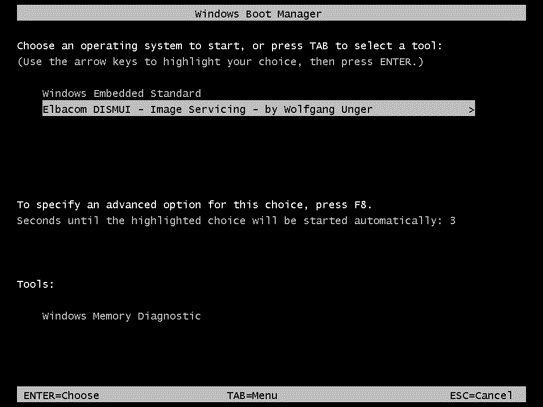
DISMUI will create and modify the Windows PE image and will reboot the device into Windows PE.
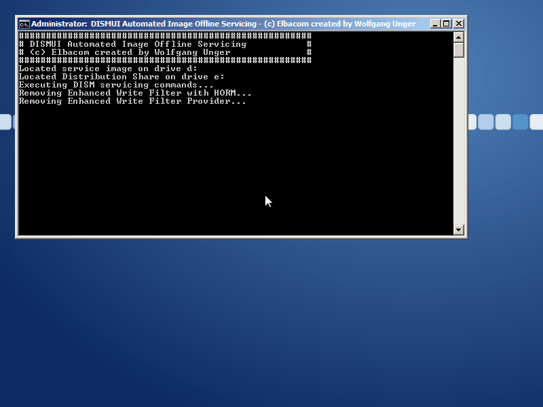
Your Windows Embedded POSReady 7 image will be modifed automatically from within the custom Windows PE.
Once this is done, the Windows PE image will be deleted automatically and the system will boot into the modified Windows Embedded POSReady 7.
Integration in Windows Embedded POSReady 7
As Windows Embedded POSReady 7 also allows end users to modify the system and it does not offer an easy way to do this, DISMUI also has a solution for this problem. Normally it would be required to boot from the setup media and modify the system from the command line.
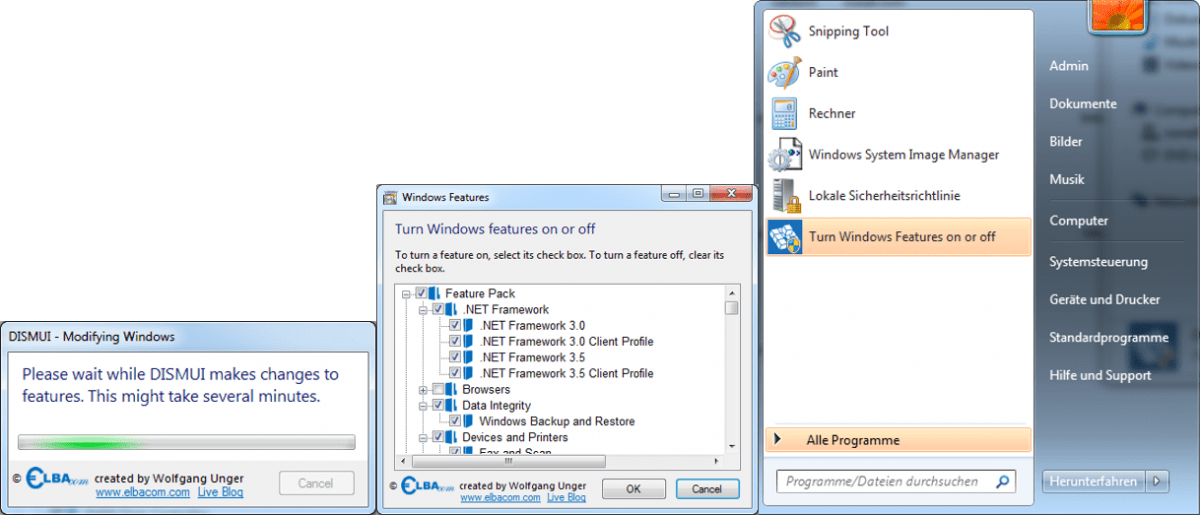
With DISMUI, it is possible to integrate the tool into Windows Embedded POSReady 7 so that it almost looks like the original “Windows Features” dialog.
From there users can make there selection, if the setup media is present. The new UI does not require any special knowledge, such as running dependency check. Just make the selections and click on “OK”. DISMUI will then do the changes offline as described above.
The integrated version of DISMUI can be launched from the start menu by typing “Turn Windows Features on or off” or by looking it up in the “All programs” folder of the start menu.
To integrate DISMUI run the following command:
DISMUI.exe -Integrate
Driver Installation in Windows Embedded Standard 7 and Windows Embedded 8 Standard
In Windows Embedded Standard 7 and Windows Embedded 8 Standard it is important to connect all devices during setup time.
This is because the setup only install device drivers for the devices that are present during this time.
Therefore it can happen that some devices will not work if they are connected lateron.
Normally you would need to look for the correct driver package in your Distribution Share or Catalog manually. This can be a hard task, given the fact, that there are a few hundred driver packages available.
With DISMUI you can solve this issue very easily. Just insert the setup media and run DISMUI.
Select “Driver Installation” and click “Next”.
DISMUI will now try to find a matching driver on the setup media.
It will preselect all found drivers.
You can add additional drivers, if required, or just click “Next”.
Finish the wizard by clicking “Next” again.
After a reboot the device should work.
Dependency Viewer
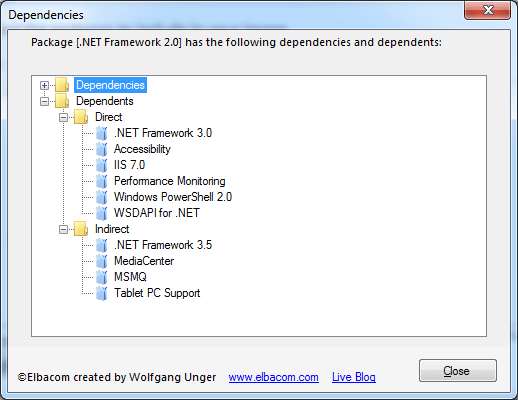
DISMUI can show the full dependency list of a component. It will not only show the dependencies of a component but also the dependents of this component.
Meaning you will get a full list of all components that you, for example, need to uncheck as well to remove a specific component.
To view the dependencies just select it and click on “Show dependencies”.


