Manually adding feature packages to POSReady 7

Windows Embedded POSReady 7 allows you to add and remove features at any time. Feature Packages must be added while the system is offline – therefore the easiest way to do this is to boot from the POSReady 7 DVD.

Here is a short guide how to add feature packages very easily.

Alternatively you can use our free tool DISMUI to complete these steps automatically via a graphical user interface.

Add Feature Packages to POSReady 7

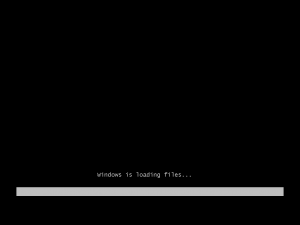
  1. Boot from the Windows Embedded POSReady 7 Setup DVD
    PR7_1
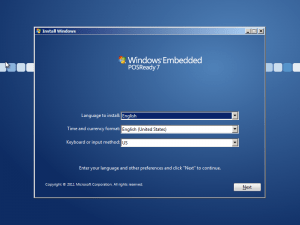
  2. Press Shift+F10 to open a command prompt when the language selection screen appears.
    PR7_2PR7_3
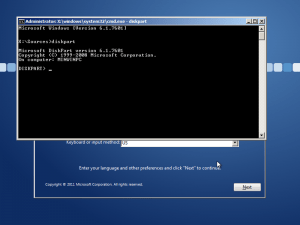
  3. Run diskpart.exe
    PR7_4
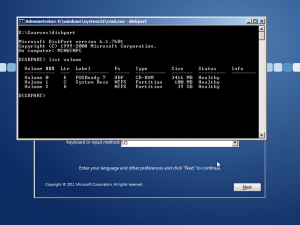
  4. Type the following command:   list volume
    PR7_5
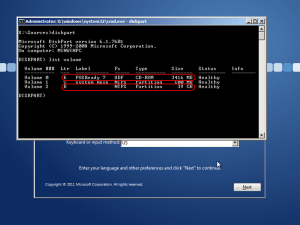
  5. Identify your POSReady 7 installation volume (in this sample D: ) and your POSReady 7 DVD drive (E: in this sample)
    PR7_5_2
  6. Exit dispart by typing: exit
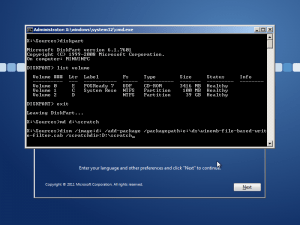
  7. Create a Scratch directory on your POSReady 7 installation volume by typing the following command:
    md D:\Scratch  (D: should be your POSReady 7 installation volume)
  8. Type the following command to add a feature package
    DISM /Image:D: /Add-Package /PackagePath:E:\DS\<Package_Filename.cab> /ScratchDir:D:\Scratch

    Please replace D: by your POSReady 7 installation volume and E: with your POSReady 7 DVD drive letter.
    To enter the package filename more easy you can add a blank after /PackagePath: then type E:\DS\ and press Tab until you see the correct package file name. After that remove the blank again.PR7_6
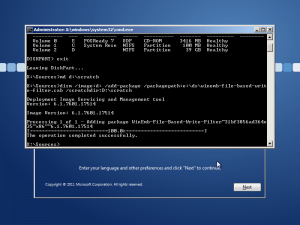
  9. After this the feature package will be added. Please make sure to reapply all installed language packages by using the same command as described in point 8.
    PR7_7
  10. Reboot your device to complete the installation


Remove Feature Packages from POSReady 7

Removing Feature Packages is much easier than adding them as this can be done directly in the running system.

  1. Open an administrative command prompt by pressing the Windows key to open the start menu.
  2. Type: cmd   and press Ctrl+Shift+Enter
  3. Click Yes to open the command prompt.
  4. Type the following command to identify installed feature packages: DISM /Online /Get-Packages
  5. Insert the POSReady 7 DVD into your DVD drive
  6. Type the following command to remove a feature package:
    DISM /Online /Remove-Package /PackagePath:E:\DS\<Package_Filename.cab>

    Please replace E: with your DVD drive letter.
  7. Restart your device to complete the removal process.
2019-04-16T20:43:42+02:00

Choose your platform to share this!

Manually adding feature packages to POSReady 7

Windows Embedded POSReady 7 allows you to add and remove features at any time. Feature Packages must be added while the system is offline – therefore the easiest way to do this is to boot from the POSReady 7 DVD.

Here is a short guide how to add feature packages very easily.

Alternatively you can use our free tool DISMUI to complete these steps automatically via a graphical user interface.

Add Feature Packages to POSReady 7

  1. Boot from the Windows Embedded POSReady 7 Setup DVD
    PR7_1
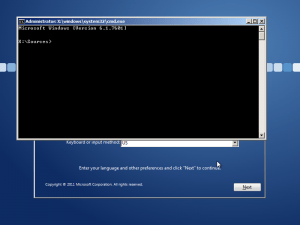
  2. Press Shift+F10 to open a command prompt when the language selection screen appears.
    PR7_2PR7_3
  3. Run diskpart.exe
    PR7_4
  4. Type the following command:   list volume
    PR7_5
  5. Identify your POSReady 7 installation volume (in this sample D: ) and your POSReady 7 DVD drive (E: in this sample)
    PR7_5_2
  6. Exit dispart by typing: exit
  7. Create a Scratch directory on your POSReady 7 installation volume by typing the following command:
    md D:\Scratch  (D: should be your POSReady 7 installation volume)
  8. Type the following command to add a feature package
    DISM /Image:D: /Add-Package /PackagePath:E:\DS\<Package_Filename.cab> /ScratchDir:D:\Scratch

    Please replace D: by your POSReady 7 installation volume and E: with your POSReady 7 DVD drive letter.
    To enter the package filename more easy you can add a blank after /PackagePath: then type E:\DS\ and press Tab until you see the correct package file name. After that remove the blank again.PR7_6
  9. After this the feature package will be added. Please make sure to reapply all installed language packages by using the same command as described in point 8.
    PR7_7
  10. Reboot your device to complete the installation


Remove Feature Packages from POSReady 7

Removing Feature Packages is much easier than adding them as this can be done directly in the running system.

  1. Open an administrative command prompt by pressing the Windows key to open the start menu.
  2. Type: cmd   and press Ctrl+Shift+Enter
  3. Click Yes to open the command prompt.
  4. Type the following command to identify installed feature packages: DISM /Online /Get-Packages
  5. Insert the POSReady 7 DVD into your DVD drive
  6. Type the following command to remove a feature package:
    DISM /Online /Remove-Package /PackagePath:E:\DS\<Package_Filename.cab>

    Please replace E: with your DVD drive letter.
  7. Restart your device to complete the removal process.
2019-04-16T20:43:42+02:00

Choose your platform to share this!

Go to Top